Imports with aliases
Path aliases have been with me for years, but recently I had a chance to join a new project. To my surprise path aliases were not set to work with my code editor (VSC) and I needed to set it up to work comfortably.
This situation showed me how important aliases are, and how limited is work without it.
What are path aliases?
Normally you are able to import files using relative paths. Relative paths are not so bad, especially for small application, but when your app grows then maintaining it with relative paths is so hard and could be annoying.
Relative path example:
import { Header } from '../../components/Header;
Alias path example
import { Header } from '@components/Header;
As you can see above, alias lets us import resources from any place in your code starting from @components which points directly to the path set for this alias.
In this article I am going to show you path aliases implementation for React application created with and without CRA.
Application created without CRA
For application created without CRA we need to define aliases in webpack file.
module.exports = {
    ...
    resolve: {
      ...
      alias: {
        ...
        'components': path.resolve(__dirname, '../src/components/'),
        'images': path.resolve(__dirname, '../src/images/'),
      },
      ...
    },
    ...
};
After setting aliases in webpack config file we should be able to use aliases.
import { Header } from '@components/Header;
Before I show you how to set aliases for CRA apps, I would like to mention that in the end of this article you can find instruction how improve your VS Code to work with aliases.
Path aliases for CRA
If you created React application with CRA, then you don't have an access to webpack file. To be able to set aliases or make another config changes you can eject or use external library which let you override CRA configuration files.
Path aliases with CRA eject
To get more information about ejecting CRA, please read a documentation https://create-react-app.dev/docs/available-scripts/#npm-run-eject
Remember that this is one way command - You won't be able to bring your application back!
What CRA documentation says about ejecting:
If you aren’t satisfied with the build tool and configuration choices, you can eject at any time. This command will remove the single build dependency from your project.
Instead, it will copy all the configuration files and the transitive dependencies (webpack, Babel, ESLint, etc.) into your project as dependencies in package.json.
To eject you should write following command.
npm run eject
Now you can edit your config/webpack.config.js the same way as we did in the first example:
module.exports = {
    ...
    resolve: {
      ...
      alias: {
        ...
        'components': path.resolve(__dirname, '../src/components/'),
        'images': path.resolve(__dirname, '../src/images/'),
      },
      ...
    },
    ...
};
Great, you should be able to use aliases like so:
import { Header } from '@components/Header;
External library to override CRA config
In this example I use Craco library. This library let you override CRA configuration without ejecting.
For this example I created repository where you can see my code and commits for all needed steps. https://github.com/michalrozenek/import-aliases
Ok, let's do this!
First we need to install craco.
$ yarn add @craco/craco

# OR

$ npm install @craco/craco --save
Create a craco.config.js file in the root directory and configure it
const path = require('path');

module.exports = {
  webpack: {
    alias: {
      '@components': path.resolve(__dirname, 'src/components/'),
      '@images': path.resolve(__dirname, 'src/images/')
    },
  },
};
Update package.json scripts section by replacing commands for craco instead of react-scripts.
/* package.json */

"scripts": {
    "start": "craco start",
    "build": "craco build"
    "test": "craco test"
    "eject": "craco eject"
}
That's all, now you should be able to build your application.
VS Code aliases setup
Currently we have aliases set for webpack which is great! But... we are not able to work comfortable with our imports. We are not able to navigate through files by clicking on import.
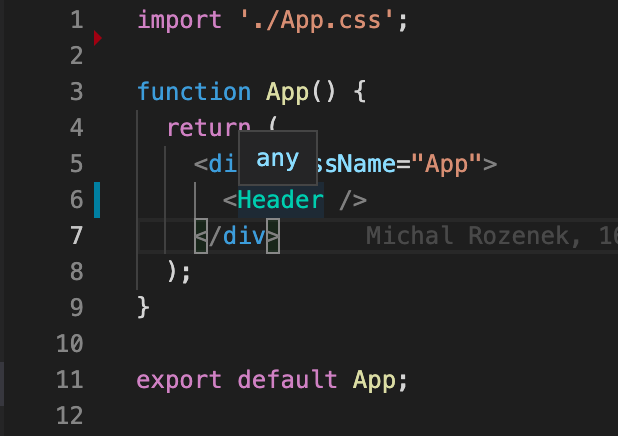
Please take a loot at image below

You can notice that when I hovered the mouse over Header component then VSC showed me just any. Nothing more about Header component reference. Similar situation when I try to click on Header in import path - Nothing happens.
To solve it we need to tell VS Code about our aliases.
First we must define new file in the root directory (jsconfig.json) and set few things. In this example I would like to focus mostly on two:
- baseUrl: It is starting path for our aliases
- paths: Here we can define our path aliases starting from place equivalent to baseUrl
{
  "compilerOptions": {
    "baseUrl": "./",
    "paths": {
      "@components/*": ["./src/components/*"],
      "@images/*": ["./src/images/*"]
    },
  },
  "exclude": ["node_modules"]
}
More about jsconfig here

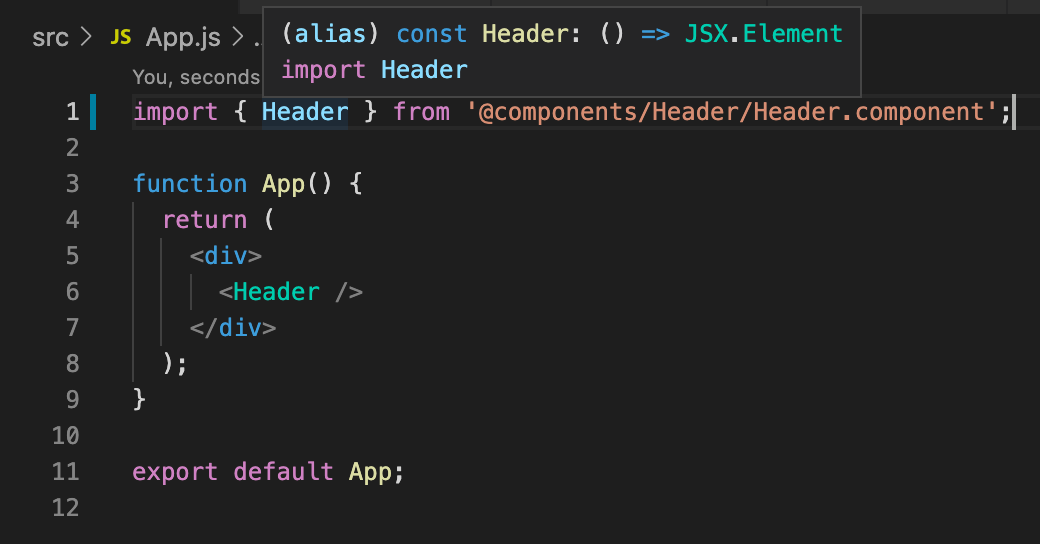
Now you can see that VS Code shows me what Header is and let me go directly to the file which contains it. Awesome!
Sum up
Aliases are great! But the real time saver is a proper VS Code configuration to handle hints and navigation between files. I really hope that this article will save your developing time.
Enjoy.

